
This post contains affiliate links. If you make a purchase through my links I will make a small commission to help maintain this blog and fund Instagram projects. Thank you for your support!
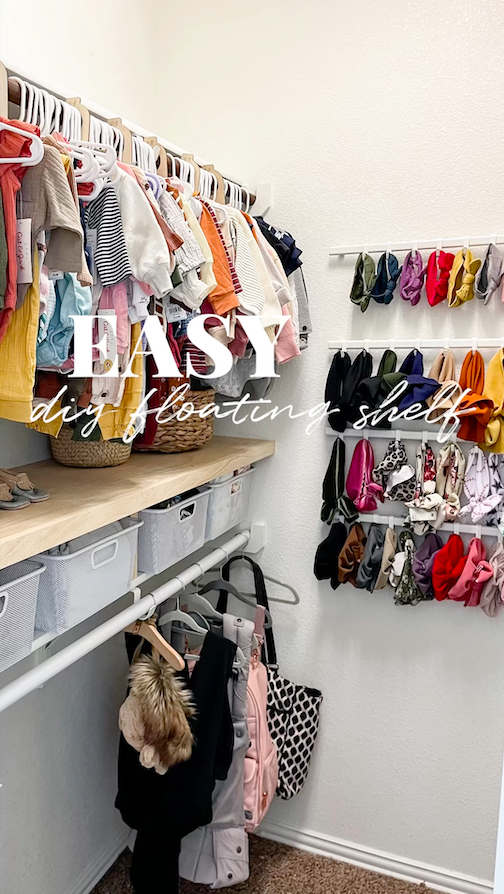
I needed more space or something to help me better organize the nursery closet. I didn’t want to spend a whole lot of money, and I didn’t want to spend a whole lot of time on it either. I decided on a floating shelf, which was just what I needed. It allowed me to store things under the shelf and above the shelf. Today I’m going to share with you how I built this VERY EASY floating shelf and how you can do the same in your own home. Let’s get started!
Tools
Materials
Lumber
-
Plywood for the top
-
I used this oak plywood that I had leftover from another project. It ended up being the perfect width, I just needed to cut it down. If you build a shelf 12 inches wide or smaller, you can also use this common pine wood. If you need something 13 inches or wider, you will need to buy a sheet of plywood and cut it to size.
-
-
Plywood for the bottom center support piece
-
NOTE: Ths may or may not be nessassary. more details on how you can find out if its needed for your project under “Time to Build” below
-
-
1×2 or Edge banding (for front of the shelf)
-
I used a 1×2 for this project because I wanted the finish to be thicker than plywood. You can use edge banding to cover the raw edges of the wood. You will also need 1×2 for your support pieces under the top shelf. The amount of 1×2 boards will be determined by the measurements of your space.
-
Time to Build
The first thing you want to do is measure the area you are working with. I am measuring wall to wall and back wall to the door frame for this space. This will give me the measurements I need for the top pieces of the shelf.

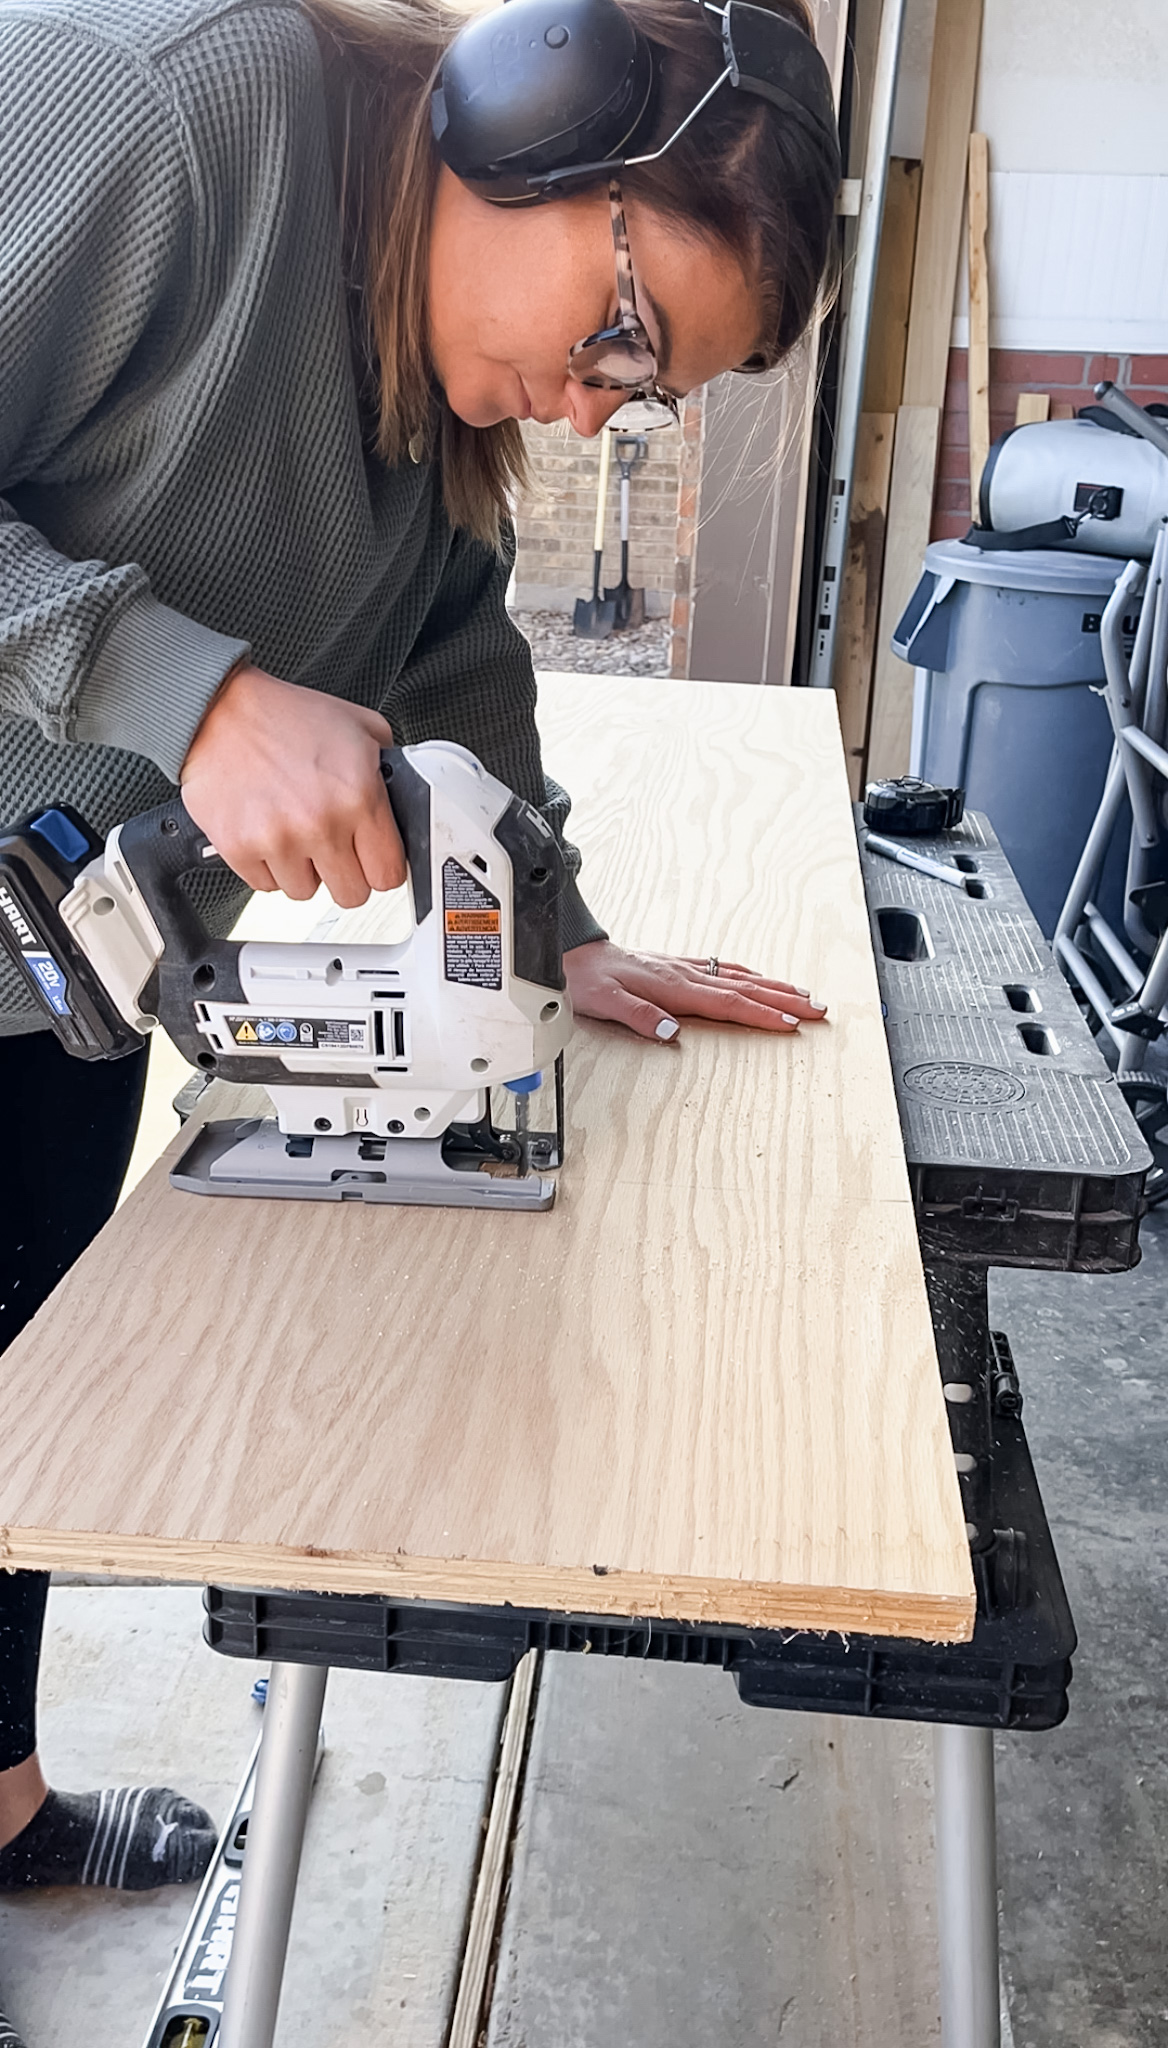
After you have the correct measurements (always remember to measure twice, cut once), you will grab your jigsaw or miter saw to make your cuts. Because my wood was wider than my miter saw, I used my jigsaw to cut it down.

After you have your top piece cut, you want to cut down your 1×2 support pieces. These will be the pieces you secure to your wall. The easiest way to measure them is the length of your top piece and cut the exact measurement for the back support. For side pieces, measure the width of your wood and subtract about 1-1.5 inches. If you subtract 1 inch, your support piece should but up right to the front of your top shelf piece. If you cut 1.5 inches, you should be left with about a .5 inch gab from the front of your top pieces.
-
TIP: If you are using a 1×2 to cover the raw edge of your shelf, I would 1-1.5 inch side pieces. If you are using edge banding, I would cut 1.5-2 inches so that you don’t see the underside support pieces from the front.


NOTE: In the left photo, you will see a 1×4 and 1×2. I was using what I had on hand, and I didn’t have enough 1×2 for my back support pieces. I decided to use a 1×4 because I had enough of it, but if I were buying all new lumber for this project, I would have got enough 1×2 for all the support pieces.
Once all your lumber is cut, give it all a good sanding so that your wood is nice and smooth. I decided not to sand or paint my wood because I loved the natural oak look. If you want to stain or paint, now would be the time to do so (after sanding).

Now it is time to secure to the wall. The first step you will do is attach the back 1×2 support piece to the wall. Find all the studs on the wall and mark them using your stud finder.
Once you find your studs, place your support piece against the wall, set your level on top of the wood to ensure its level, then secure to the wall using screws or nails.

After you secure your back pieces, secure both side pieces. To do this, place your side pieces against each end of the back support pieces and the side walls. This will give you an excellent U shape (both side and back wall) for your top piece to set on safely.

Now that your support pieces are secure place your top-shelf piece on top of your support pieces and secure them using your nail gun. You will nail the top part into the support pieces to do this. After the top piece is secure, add your edge banding or your 1×2 to the front of the raw edge top piece.
NOTE: If you are using edge banding, you will need a hot iron to secure to wood. If you are using a 1×2, you will only need your nail gun.
This next part is optional or may not be necessary depending on the space you are working with!
If your shelf is pretty long, like mine is, you will also want a middle support piece. If your shelf is relatively short, you may not need this. I did, so after I got my shelf built, I decided where I wanted my middle support piece to go and got to cutting.
It ended up looking best right above the center bracket on the original bottom shelf. Since the back support piece prevented the center support piece from butting against the wall at the top, I used my jigsaw to cut out a notch.
Place your support piece where it needs to be, then use your nail cut to secure to the top piece. I also attached the support sides to the back wall using screws. To do this, drill into the wood, then go in at a slant to secure snug into the wall.
After placing your center support piece, add edge banding or a 1×2 (whatever you used for the top shelf piece) to the raw edge of the center support piece. It should look something like this once you finish!

Fill in all your nail holes for the final step, and you are done! As I stated before, I loved the oak wood’s natural look, so I chose not to stain or paint. I did, however, paint the rod below on the original shelf to make this space look more cohesive.
For a “How To” video, visit my IG, where you can find a highlight called “floating shelf.” Here you will see a more detailed look into all the above steps!
Follow me on Instagram for more budget-friendly DIY and home renovations. Here you will find me in stories sharing live step-by-step tutorials, and you are the first to know what’s new and coming to the blog!
If you build this in your home, I would love to see it! Tag me on IG @rusticrosehomestead or use #rrhdiy so I can share your work.
This post contains affiliate links. If you purchase through my links, I will make a small commission the help maintain this blog and fund Instagram projects.


Comments will load here