

Are you looking to achieve a high-end look for less without using several power tools? Don’t you worry! I have a simple and cost-effective solution for you. I will also share a more costly solution that requires no cutting or nailing.
Box molding, also known as wainscoting or wall molding, has been a popular wall treatment for centuries, adding architectural interest and charm to any room. It’s honestly my favorite treatment to add to every room. I even have it in our bathroom, which you can see here. Although using power tools is much easier, It’s not always an option. So, I will share two (technically three) ways to achieve this look.
This post contains affiliate links. If you purchase through my links, I will make a small commission that helps maintain this blog and fund Instagram projects. Thank you so much for your support!
Materials Needed With Power Tools
- Power Miter Saw
- Brad nailer
- Brad nails
- Nail Setter
- Laser Level
- Caulk
- Wood Putty
- Painter tape (optional)
- Measuring Tape
- Spacer (optional, I use a scrap piece of wood for this)
Materials Needed Without Power Tools
- Miter shears
- Hammer
- Nail setter
- Level
- Caulk
- Wood putty
- Painter’s tape (optional)
- Measuring Tape
- Spacer block (optional)
Step-by-Step Guide
Step 1: Measure and Plan
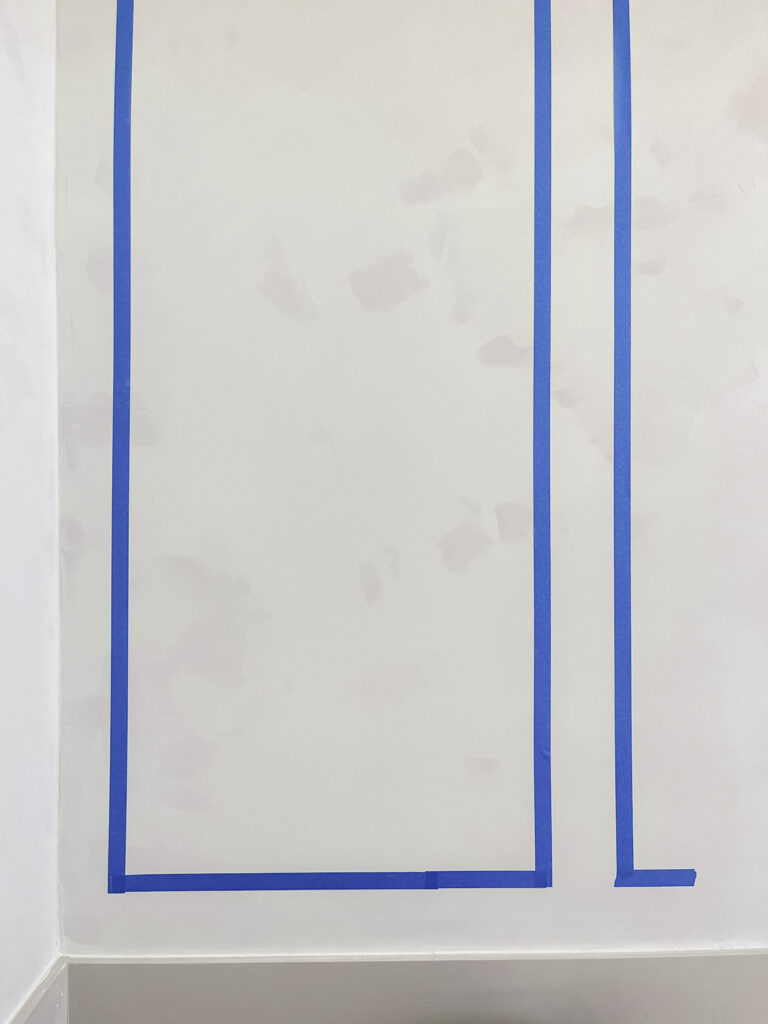
Start by measuring the width of your wall using a tape measure. This will help you determine the size of the boxes you’ll be creating. Take into account any obstacles like light switches or kitchen cabinets. Next, use painter’s tape to mark the desired placement of your box molding, ensuring symmetry and balance in your design. I like to use this wainscoting layout calculator to determine the size of each box needed.
Step 2: Cutting and Assembly
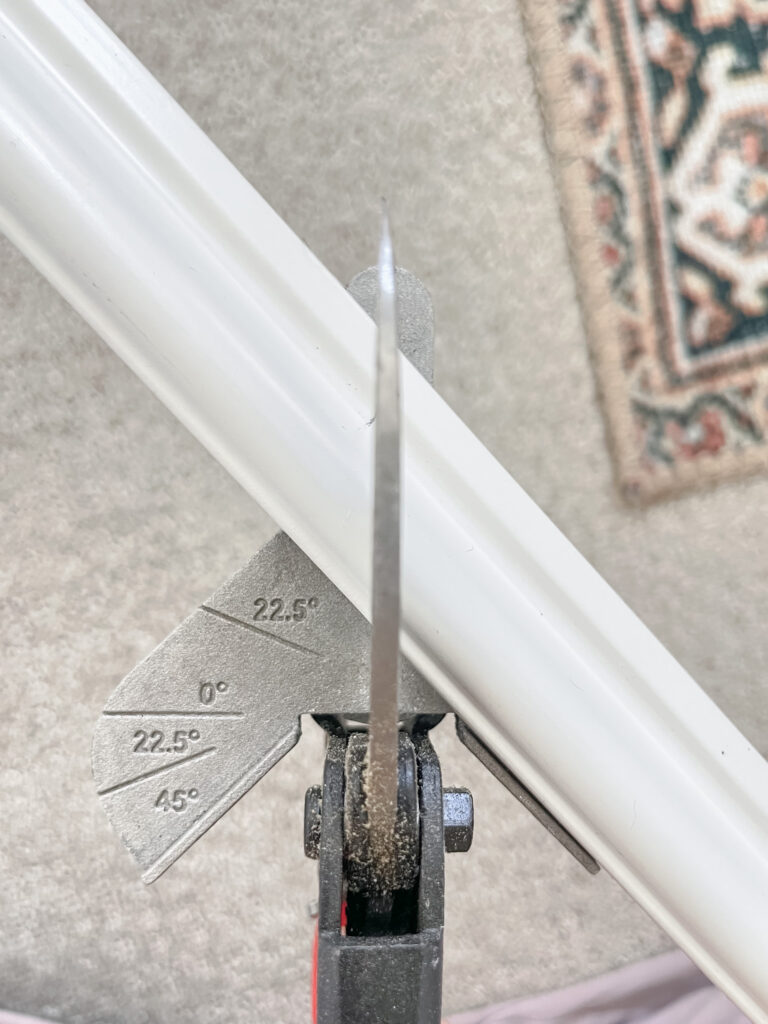
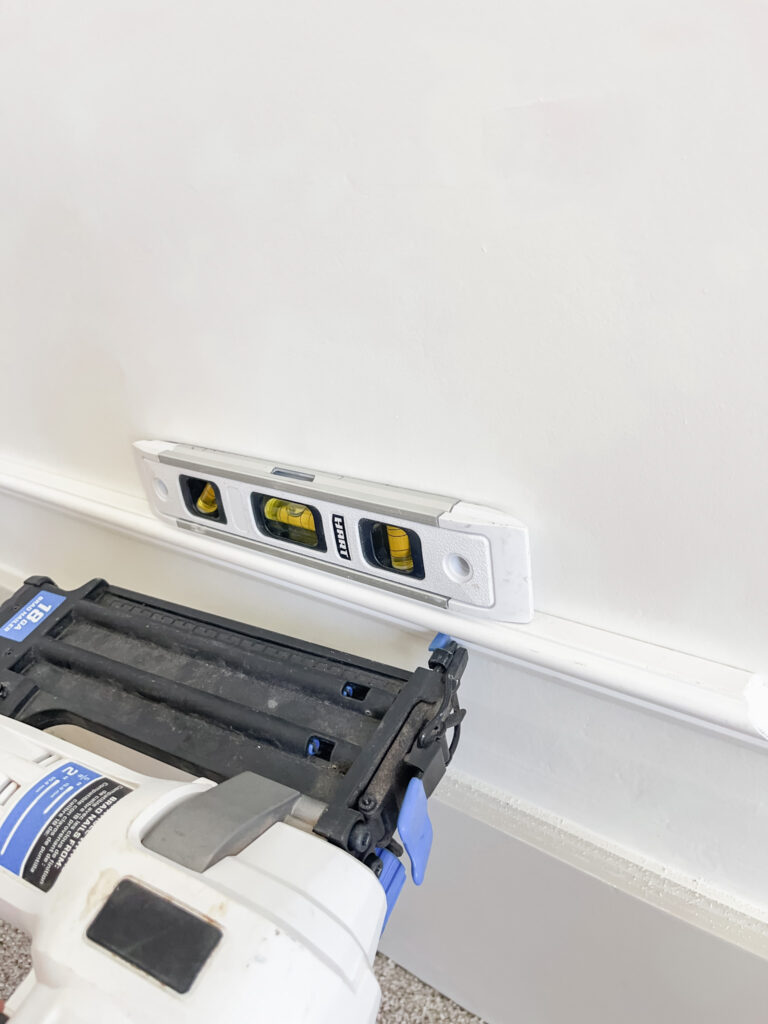
Make precise 45-degree angles on the molding pieces using your miter shears or miter saw. Take time to achieve precise cuts, which is the best way for a professional finish. I always like to say “measure twice, cut once”. Assemble the molding pieces using butt joints or scarf joints for corners, ensuring a snug fit. Secure the pieces with nails or a nail gun, use a laser level or level and adjust as necessary for outside miters and inner corners.
Step 3: Installation and Finishing
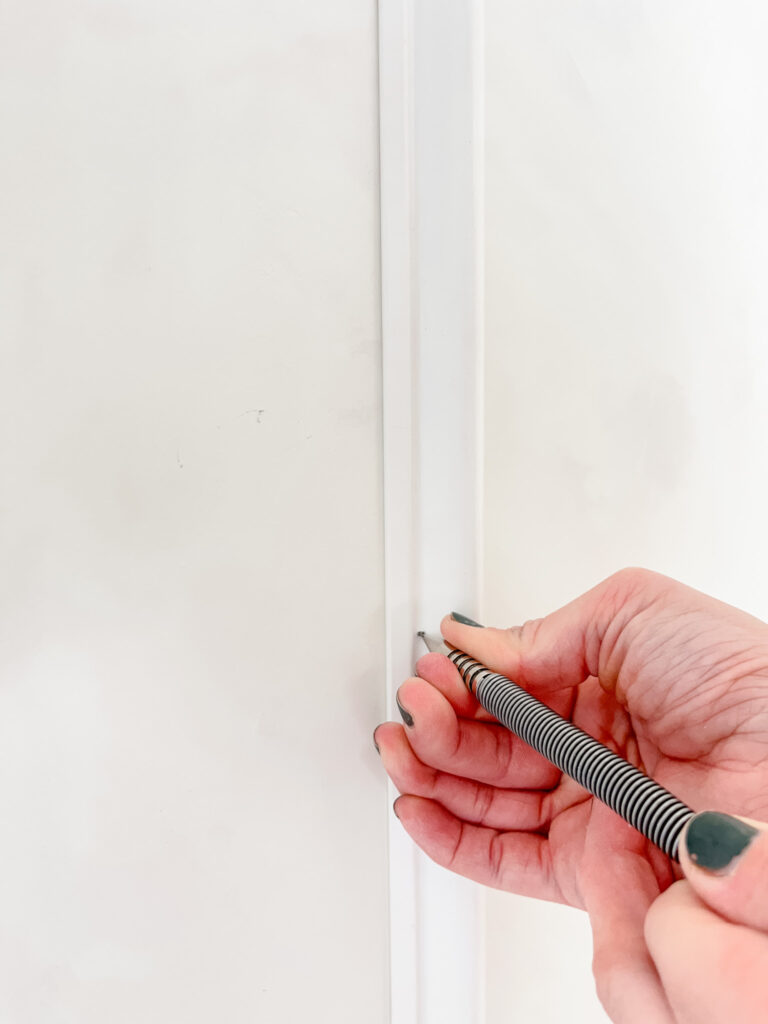
Once all the molding is in place, set all nails so that they are flush with the wall, and fill any nail holes with wood putty and sand smooth for a seamless finish. Apply caulk along the seams for added durability and aesthetic appeal.
Final option
For those seeking a hassle-free option, there’s a third and final alternative for achieving the box molding look. Although this route may be more expensive, it requires little to no work. Amazon offers pre-cut and assembled box molding frames, making the process a breeze. With a peel-and-stick adhesive on the back, you have to measure your wall, determine the size of boxes you need, place your order, and stick them to your wall. Easy peasy!
Final Thoughts
Best part? Adding DIY box molding allowed the opportunity for customization. With a little creativity, you can tailor the design to suit your personal style and preferences. Experiment with different box sizes, trim moldings, and paint colors to achieve a look that truly reflects your style. The possibilities are endless, whether you prefer a classic, traditional aesthetic or a more modern, eclectic vibe. Plus, DIY projects like this allow you to put your own stamp on your home decor, creating a space that feels uniquely yours.
Additionally, DIY box molding offers both aesthetic and practical benefits. Adding molding to your walls creates visual interest and depth, making rooms appear larger and more sophisticated. Plus, box molding can also serve as a protective barrier, preventing walls from getting scuffed or damaged by furniture or foot traffic. This is particularly useful in high-traffic areas such as hallways, staircases, or entryways. Also, box molding can be a clever disguise for wall imperfections, such as uneven surfaces or blemishes. If you have been following along on Instagram, you know these walls were nowhere near perfect. When building, we ran into an unfortunate situation where we requested smooth texture walls, and instead, we got the worst texture job you could have asked for. Although I sanded the walls down and skim-coated, some imperfections remain. This molding helps remove those imperfections while adding charm and character. People aren’t looking at the imperfections; they are looking at the molding. With strategic placement and thoughtful design, you can effectively camouflage these flaws, resulting in a smoother, more polished look. So, not only does DIY box molding enhance the beauty of your home, but it also adds practical value, making it a win-win solution for homeowners looking to upgrade their interiors.
In conclusion, DIY box molding presents an easy and budget-friendly solution to elevate the aesthetic appeal of your home’s interior. Achieving a high-end look becomes a feasible endeavor with minimal effort and the right tools. Whether you opt for classic crown molding or trendy picture frame molding, the versatility of this DIY project allows you to customize your space according to your unique style preferences. The key is to take your time and ensure precise measurements and cuts for a professional finish. Remember, the beauty of DIY projects lies in the satisfaction of creating something beautiful with your own hands, all while staying within your budget constraints.
If you’re eager to witness the transformation of my daughter’s room from a baby nursery to a vibrant toddler space, I invite you to join me on Instagram. There, you’ll gain exclusive access to behind-the-scenes videos and sneak peeks of the room as it evolves. From framing the window to selecting paint colors and adding crown molding, every step of the makeover process will be documented for your enjoyment. Witness firsthand how a room that started with nothing but baseboards is transformed into a functional and stylish haven for my growing toddler. With a two-tone palette of rosemary green trim and doors complemented by evergreen fog walls, the room is poised to exude warmth and charm. I can’t wait to share the final result with you and inspire you to embark on your own DIY adventures.
So what are you waiting for? Head to your local hardware store or home improvement center to gather the necessary supplies, and let’s embark on this exciting journey together. With a bit of creativity, patience, and a can-do attitude, you’ll soon be enjoying the fruits of your labor in a beautifully upgraded living space. Don’t let budget constraints hold you back from achieving the home of your dreams—DIY box molding is the perfect solution for adding character and sophistication to any room without breaking the bank. Join me as we turn ordinary spaces into extraordinary showcases of personal style and creativity.
This post contains affiliate links. If you purchase through my links, I will make a small commission that helps maintain this blog and fund Instagram projects. Thank you so much for your support!


Comments will load here